 |
|||||||
|
|
|||||||
|
I travel a lot; I hate having my life disrupted by routine. ~ Caskie Stinnett
Stop worrying about the potholes in the road and enjoy the journey ~ Babs Hoffman
"It is incumbent on every generation to pay
its own debts as it goes. A principle which if acted on would save
one-half the wars of the world."
-
Around the Next Turn is Where Our Adventure Begins - Pat Bonish '07
"Thousands of
tired, nerve-shaken, over-civilized people are beginning to find out
that going to the mountain is going home; that wildness is necessity;
that mountain parks and reservations are useful not only as fountains of
timber and irrigating rivers, but as fountains of life."
Camping, At No Time In the History of My Life, Have I Enjoyed So Much To Be A Wife - Cindy Bonish 12/07
If
you Poison The Environment, the Environment will Poison You
Get rid of anything that isn’t Useful, Beautiful or Joyful
|
When you don't know where you're going, any road will take you there ~ Anonymous
Making The Most Important Decision –
Tool Kit List - We've had a bunch of emails asking what tools and items first timers should bring, so I went ahead and made a list of what we bring with us. By no means is this gospel, but it's a good start. Feel free to copy it and add or delete anything you need. Solar Tips, Fact's and Trick's we've learned while on the road. Fell free to send any tips or tricks of your own that might help us along. Camper Check List - A list of things we do before leaving camp. Again, this isn't gospel, but its a good start for those who might not already have a list made up.
________________________________________________ We're in the process of designing our next Camper, so if you're a camper manufacturer or a dealer and would like to partner with us, please contact us so we can build out next camper around your designs ________________________________________________ How do you decide on your house when you’re going to be towing it around the country for multiple years on a fulltime basis?
There were so many options and models to choose from in the RV world, we thought we would never be able to make the decision. Lucky for us, I’m the type that likes to do my research and compare every available option. During the deciding stages, we went to so many different RV shows and wasted many a salesman’s time with 100's of questions while walking through floor model after floor model, but we knew this was the best thing to do when still in the researching stage of the adventure. If there is one word of advice I can give to a new buyer looking to buy their first RV or ANY RV for that matter, "Go to as many RV shows as possible!" and like the old saying goes, a little more money spent will take you a long way once on the road.
While visiting the RV Shows, the showrooms and the
various dealerships, make sure you bring a pad of paper and jot down
notes about what you like and dislike in different models you browse
through. It helps if you bring the same pad of paper with you each
time you visit this way you can
This will really help narrow the search down and you will soon find there might only be a handful of models you should even be looking at to suit your needs. You get what you pay for, and no amount of fancy gimmicks will make up for shoddy craftsmanship. Make sure to ask questions like "Does this manufacturer pay their employees on a number of units completed basis?" or "What kind of warranty does this RV come with?" Questions like "Will the builder custom make things for me or can I only buy what's on the dealers lot?" are questions that will tell you whether you should even be looking at the model or not.
Ask other questions like
"Does the builder offer
factory tours of their manufacturing facility?" These are all
questions that will show you if the builder isn't afraid to let people
in to see their type of craftsmanship.
But remember, we lived in this camper 365 days a year
for almost 4 years straight, we really didn't look at the cost, we more
or less wanted to make sure the coach would last the entire amount of
time we planned on being on the road without too many repairs
needed. That simple feature
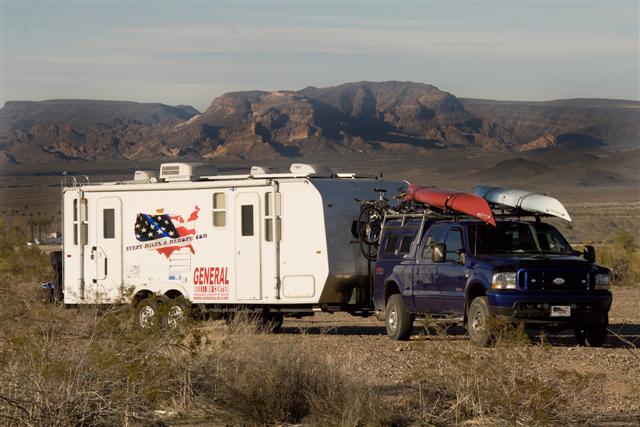
Most RV's these days just aren't built for the Full-Timing crowd and if you tell your sales person this right from the start, you will save a lot of time for all involved. We had originally thought we wanted to travel as light as possible after reading and following along with other explorers journeys like the Turtle Expedition. I've been reading and following along with their adventures since I was a kid. We were first looking at truck campers that slide in the bed similar to what Gary and Monika had started with in the early days of their journeys. After walking through a few models at different shows, we decided they are just way too small to live in for a few years straight and decided we needed to go with a little larger model of camper. This would sacrifice a little bit of our back country freedom of movement, but making the day-to-day life much more livable would be a trade off we would have to live with. We also figured this would give us the option of disconnecting from the trailer and leaving it in a specific location to act as Base Camp while we would go off exploring more rugged areas in just the truck or on the motorcycle. We've also found that a Roof Top Tent is a great way to have a comfortable sleeping area that stays mounted to the roof of the truck and provides us with shelter if and when we take those backcountry trips where the camper wont be able to go. More on this later.
After studying the different vehicles Gary & Monika used, I hold a much
Maybe an extended trip up to a month or two would work for such a small living space like the slide-in bed campers, but not for a multi-year trip like we had planned; so we started looking at bigger models. We really liked the Earthroamer but with the costs starting in the $150,000 range, that was much too steep for our thin wallet. You have to remember that we're just a couple of Blue-Collar folks who wanted to take a break from the normal life and go out exploring while we still had some youth left in us. We don't have that Trust Fund bank account to fund this trip, and we worked out tails off to save up for this adventure. We needed to make every dollar count. There are a few other manufactures on the market these days, so if a purpose built Class-B or Class-C is what your looking for, make sure you check out the Tiger Motorhomes, the Sportsmobiles or even something as crazy as the Global Expedition Vehicles if you have the wallet to fund such a purchase
We drool over these types of rigs, but until those Powerball Numbers land in our favor, we'll have to stick with what we've got. Our next thought was to find something just a touch larger without going up to the Motorcoach or Class-A line of RV’s. Remember that we had a few rules for this Road Trip. #1 being we would try and use as few Expressways as possible and stick to 2-lane back roads and dirt roads as much as possible. Fifth-Wheels were too large for us, as they limit the spots you can go with the overhead height they have and their weight was pushing our limits on what we wanted to pull. That helped out
our decision making because there are so many
Fifth-Wheels
I didn’t even want to get that idea in my head and Thankfully neither did she. A larger RV limits you to main roads and larger full-service RV parks, which just isn’t our cup of tea when it comes to our type of adventure we had planned. See, we like to travel on back roads and tend to turn around quite a bit in order to take pictures or make a side trip down some two-track trail to get into the backcountry. By no means is there anything wrong with RV Campgrounds and this traditional type of travel, but we enjoy the seclusion of backcountry exploring and hiding out in the great outdoors surrounded by the quiet of Mother Nature, not in a crowded campground surrounded by fellow campers, although over the multiple years of travel, we had some awesome times in the RV Campgrounds we did stay in. There are quite a few RV’s on the market today that allow you to bring the comforts of the RV world into the backcountry, but at the time we were making our purchase, we couldn’t find any that met our long checklist of needed options and ground clearance
Since we've been on the road for so many years now, we both have agreed that our 25' Travel Trailer is still too large for how many times we like to turn around. We have taken it down some roads that we probably shouldn't have, and we both are thankful that we added the lift kit as we would have been stuck many a times without it. We both agree, for how little time we spend in the coach, as long as we had a good size comfortable bed to sleep in that is always made up, and a full size kitchen, then the rest is just overkill. What I mean, is we dont want a camper that we have to take a table down or move a couch to convert it into the bed each night to sleep on. This would get old after the 2nd night. We really like the size and light weight features of the Casita's, the Scamp's, the Oliver's and the Fun Finder's, but I question their reliability and durability when it comes to living out of one for years at a time. Most owners are the Weekend Warrior Types, and I've yet to find someone who lives out of one fulltime. But if any of the companies would like Cindy and I to be their spokes models, give us a holler and we'd like to be the first to do a long term test for them!
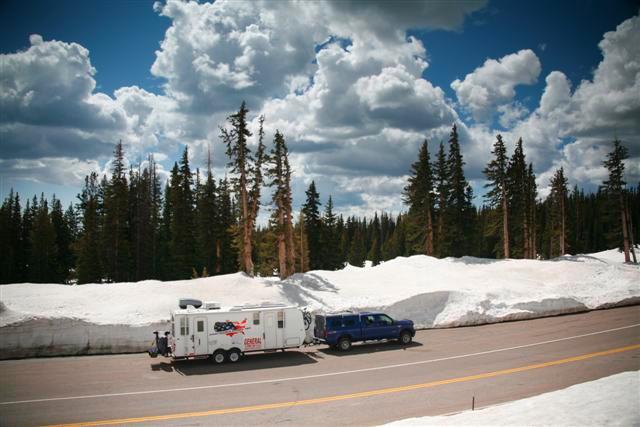
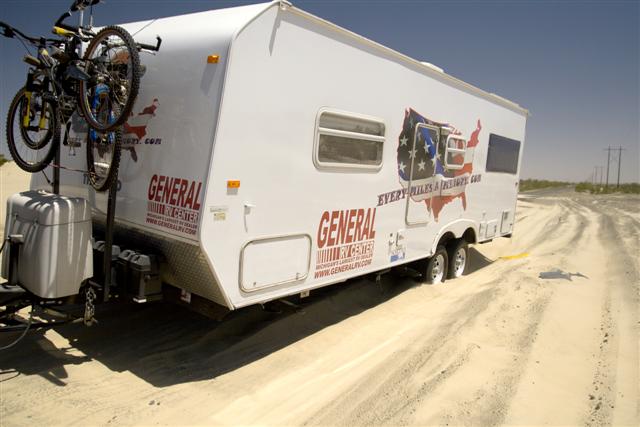
************** Back to why we bought what we did: When we walked into General RV in Wixom Michigan back in September of 2006, we had already spent countless hours of research and had our choices narrowed down to a few selections. After a quick walk-through, with many helpful comments from the General Manager, Wade Stufft, we had made our decision on a 25’ Sunline Travel Trailer. The 2499TT was one of Sunline’s best sellers and I said “WAS”, because in mid-November of that same year, the company that had been around for over 40 years and was one of the staples in the RV industry, closed their doors and rolled over to play dead?!?!?
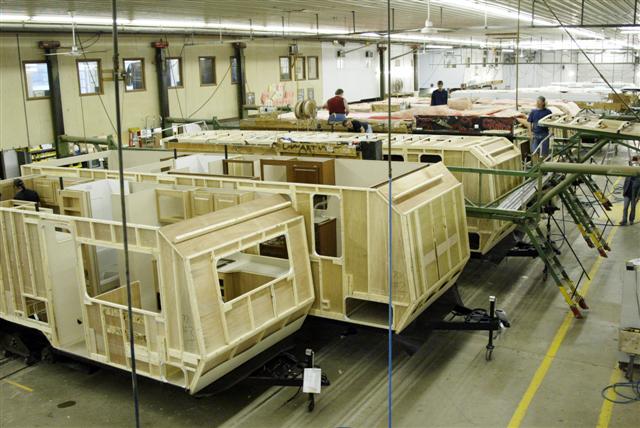
Getting back to our Travel Trailer, we choose a Sunline because of their build quality. They were one of the only companies that would build to suit and you could ask them to upgrade almost anything and they would do their best to meet your requirements. It’s such a shame to know that the company has gone out of business. I’m just glad we were able to get one before the doors shut. After our purchase, Cindy and I went to Denver Pennsylvania to see the unit roll off the assembly line and take a Factory Tour. The Sunline Factory Tour photos of our visit can be viewed on the Sunline’s Owners Club website which is a wealth of knowledge for anyone who owns a Sunline or is looking at a used model. We're so glad we did this when we did, as unbeknownst to us, the company closed it's doors the following month!?!
This is the floor plan of our Sunline 2499 Solaris Travel Trailer. We liked the fact that you could walk around the bed, and that the bathroom separated the living space from the bedroom. With a full stand-up shower, the bathroom is plenty big enough for our needs. With a full size queen bed, we didn't have to worry about sacrificing any creature comforts and if we are to ever have guests, the sofa can always fold out into a double bed. The bedroom also has it's own entrance. This has it's pro's and con's depending on who you're asking. Cindy loves it for when we're coming home to the dogs, we can enter through the bedroom and not have to worry about them jumping outside before we get their leashes on them because they're so excited for us to return....It's a Dog Thing? When we leave, they usually stay in the living room side of the camper where they've made their home on the floor under the dining table. I don't really care for the door as that's my side of the bed, so it always has to remain spotless since it's used as a walkway. For the last two years of our adventure, the door wasn't used at all and we ended up putting a storage bin with drawers in front of it that blocked most of the door. We're both in agreement that it would have been better to have that wall space used for storage or something other than a door that was never used. Oh Well, you live and learn. We later found out that Sunline would have allowed us to not have that door put in and just have the extra storage space which is much more important. Again, another reason to find a manufacturer that will allow you to customize it any way you want it. Added Options and Upgrades AL-KO Axles and a Lift Kit One of our reasons for choosing a Sunline was because of their ability to change anything we wanted. I was put in touch with Carl Kern, who was in charge of this job of customizing customer’s campers. After many hours of phone conversations
with Carl, where I learned some valuable information on RVing and travel
trailers in general, we decided to
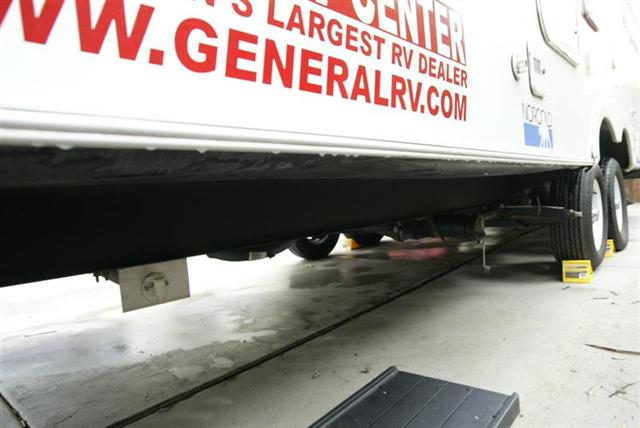
Sunline moved a few of the items on the underside of the trailer around to make sure that nothing was hanging below the frame rails and added a upgraded AL-KO Suspension package which will allow the wheels to move independently and adjust for uneven ground or rough terrain. Since being on the road, we have thanked ourselves soo many times for having this option. Of all the options we have, I'd say this has to be one of the most important. There are plenty of options to lift your stock trailer, from axle flips to lift kits. We had ours done while still at the factory, so I really cant talk of which aftermarket kit is the best. I do know that I would recommend this to anyone who logs a lot of miles traveling with a camper in tow. If you're looking to buy a new model, make sure it has plenty of ground clearance and I cant say enough about the AL-KO Soft-Ride Axles. I once opened up a can of soda right before we were leaving to spend the rest of the day driving. About 20 minutes into the drive, I asked Cindy where my soda was? We both realized I had left it on the kitchen table in the camper and it was opened. Expecting the camper to be a sticky mess from the spilled soda after miles of driving, I pulled over to find it still sitting safely on the table without a drop spilt. Again, I cant say enough about the AL-KO Suspension. **** Fully Supported Roof We had the roof fully supported so when we added solar panels or waterproof storage bins for seasonal items that won’t be used daily, we would have a secure structure to attach the items to.
The fully supported roof also allows you to walk up top when cleaning
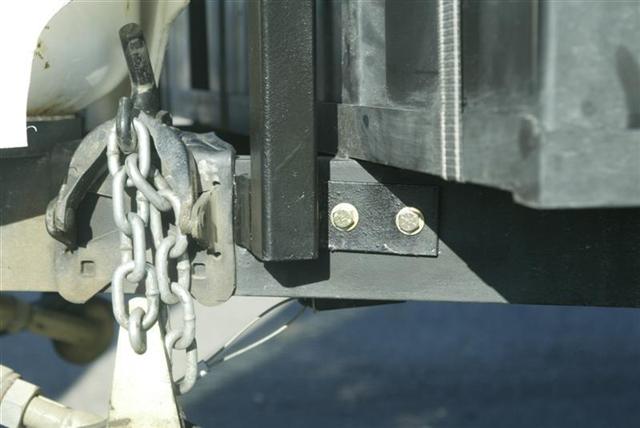
If you're having the manufacturer build your coach, ask them if this an available option. You'll be glad you spent the extra money when it comes time to clean or do maintenance on the roof and not have to worry about falling through. The only option we would have added to this package was to delete the standard Rubber Roof and have an Aluminum or Fiberglass Roof installed. No maintenance would be needed and there would be no need to worry when driving under low hanging branches which can tear the rubber roof. We've also used the roof as a shooting platform when photographing wildlife or needing a higher angle to shoot down on a subject which always makes us happy we opted for the fully supported option. If we were to order a new camper, we would have a walkable platform built atop the roof of the rig to use this more often. We'd also be able to put up an EZ-UP Tent so we could use it while at festivals or events as a party deck. These are little options you don't think about till you have the need on multiple occasions. **** Custom Hitch Assembly & Motorcycle Carrier
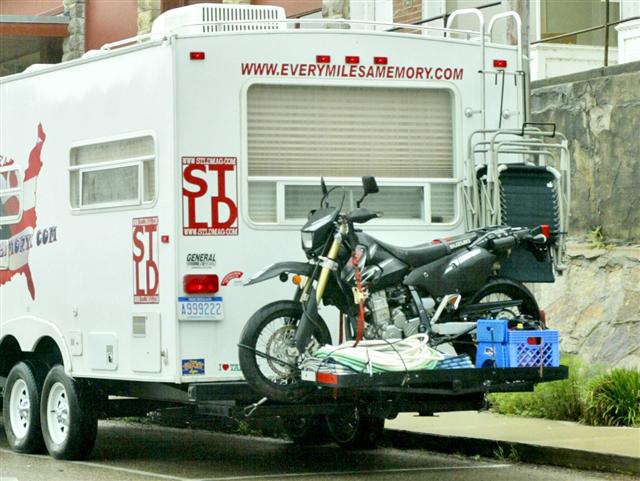
We haul a Suzuki 400 DRZ-SM on back of the travel trailer. This way we won’t have to un-hook the trailer if we just need to run into town for a small item or for getting down some narrow roads or trails that a truck might not be able to fit in. The Suzuki is very light and only weighs a few hundred pounds. With the added weight of our 4 6-Volt Lifeline AGM batteries mounted on the front of the camper, the two additions that are both quite heavy add-on's cancel themselves out almost perfectly. With the high price of fuel these days, the motorcycle, with its great fuel mileage is a much Greener way of transportation. And its so much fun to ride!
By making a custom hitch out of 2” square stock metal and welding it quite a ways under the back of the coach, the rear hitch can now support up to 500lbs. of material. This will help incase we want to add a hitch mounted generator at a later date. General RV even added a 7 Pin trailer wiring harness incase I want to add lights to the rear of the custom rack. I found a small LED light set-up at a local hardware store that is supposed to plug into a 7 pin harness and attach on the back of something being towed. I mounted this on the back of the basket for some added security and visibility of our tail end at night.
For only a few hundred dollars worth of metal, these two skilled welders were able to make a bike carrier that has stopped many people passing by to ask where I got it and how it works. After a few months on the road, we noticed the bike carrier was bouncing quite a bit due to it being so far off the back of the Camper. Asking questions on a few different RV forums, one guy who had made a similar custom rack told me to weld some tabs on the hitch side that was on the camper, and two more on the rack itself; then put two Turnbuckles between the tabs. Doing this, I was
Now we can forget the straps loosening due to the carrier moving and are much more comfortable with not being able to see the bike back there.
The bike sits right behind the bumper and behind the rack is a carry-all rack. The carry-all rack holds our water hoses, the Patio Mat we put beside our camper when parked, and our BBQ Grill. This way the things that don't matter if they get wet, can stay outside and not take up valuable space inside the campers storage bins or the back of the truck. We still have enough room if we decide to put a small generator on the back of the rack, but haven't had the need to install one yet. We had so many emails asking us for detailed pictures of the rack, so we put an entire page of just the motorcycle carrier and custom made rack on the site. Click Here to see that page. One thing I would have had made different if I could re-build it, would be to have a hitch made like this. We saw this while in the Porcupine Mountains in Northern Michigan and spotted it on another RV. It would have eliminated any rocking or sway that the rack has in it and would have been easier in the long run....But again, you live and learn.
****
Norcold 10 Cubic Foot Refrigerator Another thing we upgraded was the refrigerator. After just a few weekend trips to shake the kinks out of the new trailer, we decided the stock 8 cubic foot fridge was just way too small. The freezer could barely hold anything and you’d be lucky to get a few days of food in there, we couldn’t imagine living out of such a small icebox for multiple years! In stepped Norcold.
Again we had the boys over at General RV do the install (We’re getting to know Dave the shop manager and Wade the General Manager really well) and if any of you full timers out there want an upgrade, this is the way to go. The freezer is HUGE and the fridge itself is so much bigger, that it would be stupid for anyone who does more than just the few weekend trips a year to not spend a little extra money for the added space it gives you. I’m so glad we did this now and didn’t wait till we were on the road and have some random place do it where we don’t know their quality of work. It was quite the job for General RV to get it in because they had to remove the rear picture window to get this monster inside the coach. It was too big to fit through either of the doors, but they managed without an issue. Again, once the work was done, you would think it came from the factory and except for the new refrigerator being stainless steel, rather than the stock pine colored wood, it looks flawless!! It actually matches our stove which has the stainless finish so unless we told you it didn't come with the coach, you'd never know. I bet you never thought you’d see a grown man get so excited about a new refrigerator….HA! HA! Thanks to the people over at Norcold who thought up a way to add 2 full feet of cubic space to roughly the same size footprint and keep it looking so beautiful. We'll keep you in check with the performance and maintenance of this unit and let you know if it was worth the added expense. It also allowed us to get rid of the extra coolers we would carry in the bed of the truck to keep sodas and beer in. So with switching to the larger fridge, we actually gained more space in the bed of the truck too. **** Refrigerator Door Keeper
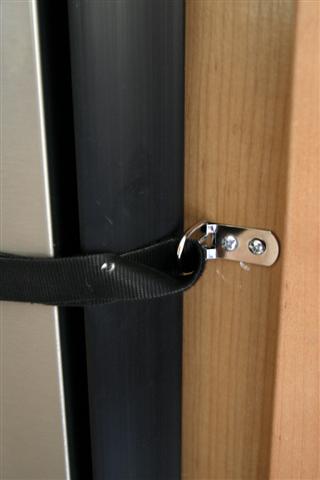
On a few occasions, we've had the doors on the refrigerator or freezer come open which allowed the contents to spill out all over the camper floor. This is not what you want to walk into when you first pull into camp! So I put on my thinking cap and came up with this little ingenious idea. It was simple, under $10 and was finished in under 10 minutes. I started with some Heavy Duty Ring Hangers that I had found in the picture hanging section of a hardware store. They have multiple sizes to choose from, I just grabbed two packages of the biggest ones they had on the shelf. They came two per pack. I screwed one ring hanger on each side of the freezer and refrigerator doors. I centered them so the straps would hold the middle of the doors when they're strapped in.
Now that I had the Velcro cut, I fed it through the ring hangers and tested it to make sure I had enough strap. Once I knew everything worked properly, I can leave the Velcro straps hanging on the hinge side of the refrigerator and not have to worry about storing them or even putting them away. When we're ready to drive off, I can strap the fridge closed within a few seconds time and never have to worry about the doors opening up and losing any of our precious food or drinks on the camper floor. **** Solar Fridge Fan
Cindy and I were camped in
Death Valley where the temperatures reached records of 117°!!
I know, not too smart considering our Sunline has wheels and can be
moved if we experience temperatures like this.
I screwed the fan to the side of the opening where
I felt most of the heat rising off the coils.
This is all you see once the install is finished. This tiny solar panel sits on top of the fridge vent and when the sun it out, the fan is exhausting the hot air out of the refrigerator cavity. There are no switches and nothing to worry about. I dont need to worry about leaving the fan on or it draining my batteries. Problem solved! Not bad for $60 UPDATE: I've found that I shouldn't have caulked all the way around the little Solar Panel. I should have only caulked the screw holes because there is water or condensation being trapped under there and the plastic part of the panel is fogging up. If you install one of these, I'd recommend you only put a few small dabs of caulk around the screws that hold down the Solar Panel itself and allow air to flow under the solar panel itself. Lesson Learned the hard way.
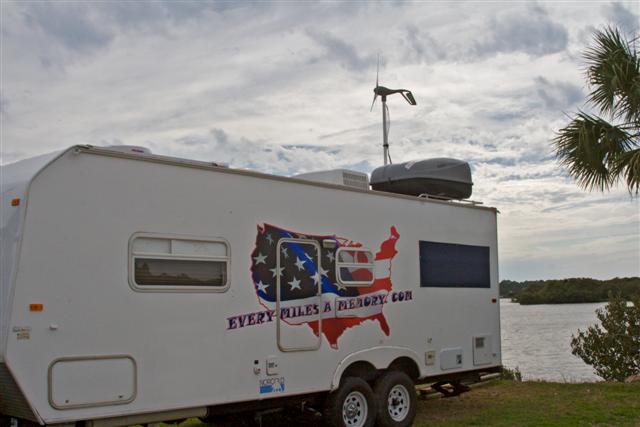
**** Solar Panels & 6-Volt Batteries Our Main Power Source and One of Our Best Investments In order to Boondock (RVing off grid and not being tied to any shore power for extended periods, which is also known as Dry-Camping, Boondocking or Roughing It) and be able to be self supportive, we needed a solar array that would allow us to charge our batteries and not have to worry about finding a campground with shore power every night. I’ll say right now that living in Michigan and trying to find anyone knowledgeable on solar power at the time of this build, was like finding someone who knows about ice-skating in Mexico. Again, I was doing hours of research on the internet and finally found a site where they knew what they were doing. AM Solar actually makes solar panels specifically for the RV industry and tests all their own equipment in the real world environment of RVing themselves. I’ll also be happy to say that AM Solar has one of the friendliest and most knowledgeable staffs I spoke with in my research, I called a few different times and each time was treated like a good friend by Kathy, who was busy with her end of the year inventory. Their panels at AM Solar are smaller and lighter than most of the competitions and their kits come with everything needed to get you on your way to self sustaining renewable power. I’m not too much of the handy man type and know nothing about electrical wiring, so I made an appointment to have the guys at General RV install the system for us
In two days time they had a Sun Runner SR-100-22 and a Heliotrope's HPV-22B Series Charge Controller installed under the bed where it was out of the way and protected from being banged into. Mounting it under the bed kept it pretty close to our batteries on the front of the camper which keeps the wiring length short and loss of power at a minimum.
For right now, I think this system will do us well. This is another time we were thanking ourselves for having the fully supported roof from the factory so we didn't have to worry about where we were putting the panels. The installers were able to hide four 6-Volt Lifeline Absorbed Glass Mat (AGM) GPL-4C Batteries on the tongue of the coach which would offset the weight of the motorcycle on the rear. You would almost think I had planned it this way?!? One thing to remember with any battery box, is to drill some holes in the bottom of the plastic box as they will fill up with water after a good rain. The battery boxes have vents on the top to allow the gasses of a normal batter to escape the storage boxes, but this also allows water to come in during a heavy rain. I drilled a few holes on each side and haven't had a problem with water accumulation since.
General RV mounted a
Xantrex
MS2000 Sine Wave Inverter / Charger
Dave and Chris who are the shop and service managers, bent over backwards to make sure our coach was in and out in record time. Carl explained to us that with the batteries fully charged, he was able to run the Air Conditioner without blowing a fuse!! We would recommend Solar to anyone full-timing and looking to extend their stay or not have to worry about staying at campgrounds nightly. Update - Things we've learned while living with Solar If you're thinking of installing a full solar set-up and planning on camping like you do when you're plugged into shore power, then save your money. There are many things you need to learn with Solar and for us, all of them seem fully justifiable. Learning to conserve our power consumption is something that really made us think about how much energy we normally wasted back in the real world. You cant just turn on the A/C when it gets hot. If you want a cup of coffee, you have to wait for the percolator to brew it rather then have instant coffee from an electric coffee maker that burns more power than we use in a single day in the camper. But having the ability to camp where ever we want, and not worry about finding a campground when some are way over priced is worth the sacrifice. We've also learned to conserve in almost everything we do. During the daytime while we're traveling, we charge all our camera batteries or cell phones off the 400 watt inverter that's hardwired inside the truck cab and wired to our truck batteries.
We've learned
to use a smaller 400 watt inverter inside the camper when we are just
working on
The only time we longed for a generator, was during the record breaking heat waves during the past few summers when the temperatures hung in the high 90's and the humidity was so thick you could cut it with a knife for a month straight. Our answer was to find a campground that provided 30 amp service and hide out in the coach with the A/C running non-stop, something we cant do with solar. Another thing we've learned, was the solar panels on the roof actually shield a bit of the sun from heating up the camper, and our bedroom tends to stay a little cooler being under the panels footprint. What I'm trying to get at is if you only camp a few weekends a year, then I don't think the switch to solar is worth the added cost at this point. If more people were to dabble with the technology which would bring the high prices down, then this would be a different story. If manufacturers were to start building RV's with solar panels standard, or RV's set-up for Boondocking in the first place, I think this would really help this type of traveling become mainstream. Until that day, I'm glad we built ours the way we did, and I look forward to learning better ways to conserve our consumption habits. You can also check out our Solar Tips and Tricks page here.
Here is another page with great reading for
those who would After four years in the camper, it's funny how things change the more you use them. The past few years were amazing and quite an eye opening experience for Cindy and I. In the spring of 2008 we decided that since we had the solar installed and were never running out of battery power, why not test it to its max. We started leaving the inverter on for days at a time to see how long it would take to drain the batteries to a dangerous level. I mean we thought we have all this, why not test it 100% so we'll know for our next build what works and what doesn't. We cant say enough about the Lifeline Batteries. They've never once failed us and we've drained them dead a few different times. We can run our computers, the flat screen television and heater all at the same time for most of the night and never have to worry about draining our bank of power.
Our only rule is to
watch the weather to see what the next day has in
But if we see clear skies in the forecast, we have no worries that a few hours of sunlight will bring the batteries up out of almost any draw we can give them. Another way we've started saving money is to run the inverter during the daytime if we're going to be away from the camper and switch the Norcold Refrigerator over to the electric mode. This way we're saving in propane and allowing the sun to keep our food and beer cold. Sounds almost silly doesn't it. Cindy and I have found it funny that when staying with people while traveling, they almost always insist that we plug into to their house or shore power. For some reason, I think people think that Cindy and I live this lifestyle like we're complete misers. In reality, we leave our computers running all day long just like most people do at home. We never worry about turning the television on to watch a movie or plugging the phones or cameras in to charge the batteries up. Our conclusion: Why is this so hard for home owners and the world to figure out? We live 100% off of solar and propane and at a simple cost of filling one propane bottle every month. Usually around $25 give or take a few bucks depending on what the going rate of Propane is. The propane heats our water, cools our food in the fridge and cooks our food on the stove. The solar panels provide all our electrical needs and allows us to live with such a small footprint, I cant think of any other way to go about it! **** Our Turbine and Air Actuated Turbine Mast
We had Dave Hoskins from Aluminess Products make us an Air Actuated Mast and it's amazing how simple it makes the turbine set-up process. Click on our Turbine Page to read more detail about the entire set-up and what we think of it. Another amazing feature that we cant figure out why more people aren't using! **** Adding a few 12-Volt receptacles for Boondocking
This gives us the availability of using 12-Volt appliances when normal 110 shore power isn't an option.
One spot we wanted a receptacle installed was in the storage locker on
the Drivers Side of the coach. We bought a Macerator Pump that runs off
of 12-Volt power and the sewer hook-ups are on that same side. There are
also various times something might come up that we need a 12-Volt
appliance on that side of the camper, and while we were having General
RV install the 12-volt outlet, we had them go ahead and throw in a 110 outlet in the storage locker
too. We plug it into the 12-Volt receptacle that came standard on the Sunline, which is in the Living Room Cabinet. When we don't have shore power availability and might not want to run the larger 2000 watt inverter, this smaller inverter drains less power off of the bank of batteries.
The only problem is, the cords of the lap top computer or anything else
were using at the living room table were slung
across the living room. This was a big argument when one of us would be
working on the Lap Top and the other would be trying to move around in
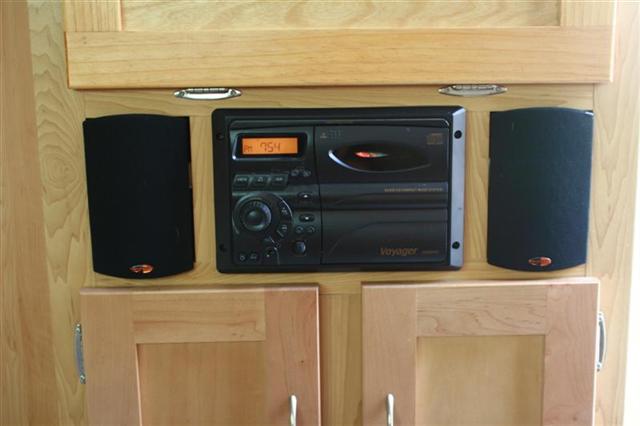
our 200 square foot of living space. **** Custom Cabinet for Living Room The Sunline 2499 came from the factory with a basic cabinet in the living room. It was designed to hold a standard TV on the top and left quite a bit of wasted space. I'm sure the guys that designed these trailers hadn't thought about the invention of Flat Screen Televisions becoming the norm, as the space was left available for a larger tube Televisions.
After we were finished, the original Maple doors look like they're the ones that have been made aftermarket. If you want to see plenty of before and after pictures, check out the Cabinet Gallery and don't hesitate to change the floor plan of your own coach if you think you can get some more space out of it. When looking at the pictures, the black thing you see on the right is my CPU which houses the DVD player and powers the sound system we installed. I was able to hook up to the the stock radio in the Aux. Inputs, so the stereo can play through-out the Coach from my CPU.
The 23"
Plasma is mounted to the wall behind it and swivels around so many ways,
you could be sitting outside and watch the Television (NO LIE!) The
Plasma also acts as the monitor for the CPU. The middle cabinet that
used to always be open and I'm assuming would be a
junk collector, we made a door for it, with
hinges so it can swing down
and hide all that clutter. That space also
houses the wireless keyboard and mouse for the
CPU and anything else that goes along with the computer. It only took us a few days of tinkering to complete everything. I think the longest part was matching up the stain and driving back and fourth to the liquor store :) A skilled carpenter could finish the wood working part of it in an afternoon.
Also, the bottom cabinet has a center piece of wood that acts as a
backstop for the two doors. I wanted to hide my Klipsch subwoofer for
the sound system somewhere and thought that I'd have to put it behind
the rocking chair.
Then I noticed the center piece of wood
was only screwed in. Once I took it out, I could install the sub
box, put
the wood back in and hide all the wiring in the cabinet.
Sometimes the littlest things just make me soo happy!! Hiding the Klipsch Speakers Since I'm a music nut, I love to hear my music played over quality speakers and usually louder then normal. I think I have over 50,000 songs in my MP3 file on my CPU or roughly 120gig of space, and Cindy and I enjoy music of every Genre.
I decided that I could pop out both of the panels that were just there for cosmetics, and hide the speakers in the wasted space of the cabinet.
Of course I had made a few measurements before hand, and
was very excited that the speaker fit almost perfectly. If you don't
want to use Klipsch, there are plenty of other speaker companies that
make speakers this size that could be hidden in these compartments. All I could think of was Cindy bludgeoning me with the speaker for cutting into the panel before figuring this out. Then upon further inspection, I noticed that the volume controls just slide off the bottom of the speaker and I could mount them under the cabinet in the next storage compartment below!! Once everything was put back together, someone walking into the coach for the first time would think they're stock. The sound coming from these little speakers is fantastic and well worth the hour it took me to install them. When Cindy and I watch movies on the DVD player, these speakers really add to the sound and make you feel as though you're at home with a larger speaker system.
Here is what the cabinet looked like
stock
With the Powered Subwoofer
hidden below the speakers and stock radio,
**** Gutter Extensions & Cleaning the Gutters Themselves One of the main things people talk about on RV Forums is Black Streaks on the sides of their campers. While touring the Sunline Factory and talking with Carl Kern, he told us one way to easily avoid those dreaded black streaks was to add a good ol' fashion Wooden Close Pins to our gutters. This would allow the water to drip freely from the camper and not allow the nastiness to collect on the side of the camper. I tried this and after a few hundred miles, realized the clothes pins, which I almost always forgot were up there, would blow off while driving.
The Gutter Extensions are something that manufactures should be putting on as standard equipment on the RV's. It's just basic knowledge that as long as you can keep the water off the side of the coach, you don't have to worry about black streaks causing you troubles. But then there is always the clutter that accumulates in the gutters. Cindy noticed the other day after a good rain, that the water wasn't even dripping off the gutter extension, it was running down the side of the coach. I crawled up on the roof to see what the problem was and see if I could figure out a way to solve this annoying habit. If you've never looked in your gutters of your camper, you'd be amazed how much junk can accumulate in there over a short period of time. One time while camping under a particular messy tree, it took me an hour to clean the gutters out. That was until I figured out this trick! After trying my hardest to get the stuff out with my fingers, which didn't seem to work, I went into the tool box and grabbed a piece of flexible rubber tubing, like what you'd use to replace your vacuum lines on the trucks motor.
By crawling along the edge of the roof with the rubber
tubing scrapping the gutter, I was able to remove any gunk that was
lodged in the gutter, which was quite a bit! The bottoms of the gutter
itself were also soiled black, which is what I'm sure causes those nasty
black streaks on the sides of the camper that we normally used our
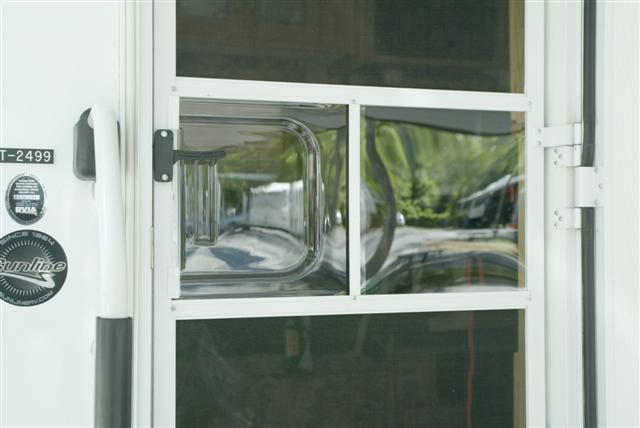
Thetford Black Streak Remover for. **** Clear Screen Door Slide
With me being so short in height, it
always bothered me when I was sitting on the couch
For some reason the Screen Door Slide section was a white piece of plastic. This drove me nuts, because I'd have to get up off my butt if I wanted to see what was going on. It seemed like what ever I was trying to see was always right in that section of my line of view. Looking through the Camping World catalog, which is like Porn for me...LOL I noticed that they made a Clear Slide Section to replace the white plastic. For only $15.99, this had to be one of those items we had immediately. Here's a picture of what it looked like originally. This is what my view was while trying to look out the door. You can see that the white plastic slide section is right where I want to see. Now with the Clear one in, I can see outside perfectly!! This is another one of those items that should come standard on all RV's!
One of my only worries once the clear section was in, was it would be easy for people to see in the door. For some reason it's hard to see through the screen from the outside, but I figured you would see right through the Clear Plexiglas. Then when I went outside to look in and my worries were eased when I noticed the Plexiglas has a curve to it, so you don't see in! Perfect!
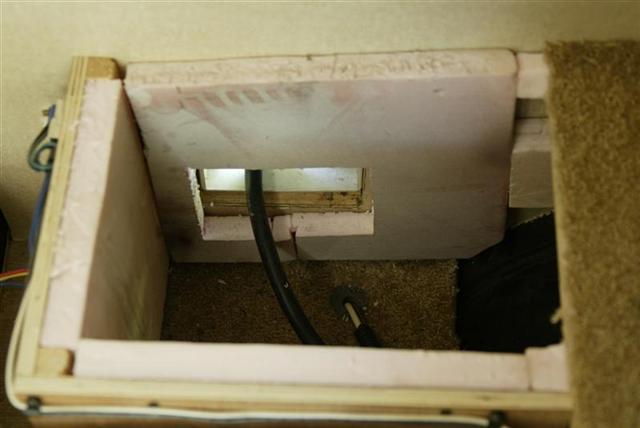
**** Insulating the Cord Compartment On our Sunline 2499, The cord storage compartment was a concern for me. Camping all last winter in some below zero temperatures, we used to fight over who had to sit on the couch. There always felt like a cold draft was blowing across your feet.
I was working on the compartment under the couch and figured out why
that draft blows so cold. **** Screen Door Closer One of my pet peeve's is the screen door being left open. There is nothing worse then having a camper filled with mosquito's, fly's or any other insects. This little item just solved many arguments.
Cindy can attest to this, as she was laughing at me cussing while bending over to keep picking it up. The package came with two springs in it. I thought one spring would be strong enough to close the door, but it wasn't. With both springs attached, it slams the screen door, so be careful. With the screen door attached to the main door, it pulls it to the door frame, but isn't strong enough to close it all the way. No biggie, as long as it pulls the screen door closed, that's my main concern. Door Closed, Cold Drink in Hand, No BUGS IN RV!! I'm a Happy Camper!! **** Adding Extra Scissor Jacks
I was getting peeved by the amount of
sway in the coach when the scissor jacks were down and we were set up
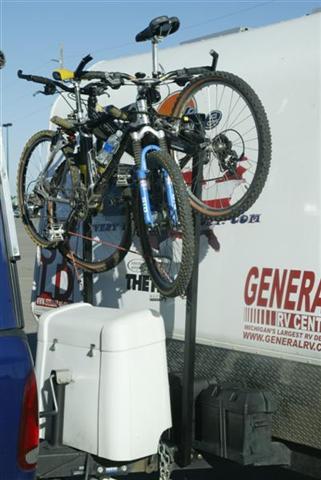
for camp. **** Mountain Bike Carrier
One of the things that was driving me
crazy was our mountain bikes. Cindy and I really enjoy riding
bikes and knew we had to bring them along, but we had no place to store
them. For our first six months, we were carrying them in the back
of the truck, but this meant we had to take off the front tires and lay
them on their sides.
This shows how the rack is bolted onto the main frame. I used Grade 8 Bolts so hopefully it'll last the many miles we log on the Sunline.
Sean added a little piece of angle so the vertical bars would be straight.
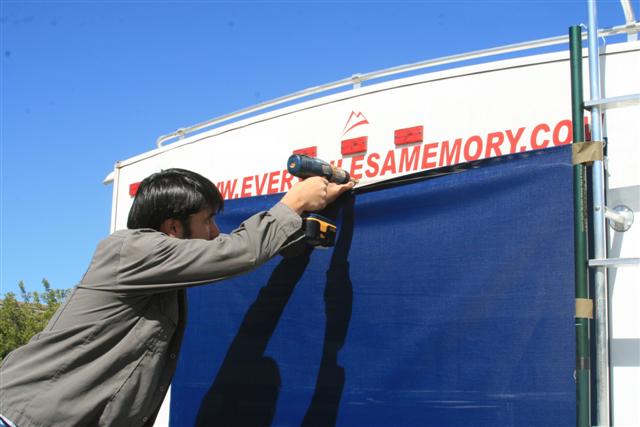
Here is the way it looks with the bikes loaded and rolling down the road. We still have access to the propane bottles and the bikes can be pulled down quick if we want to go for a ride. So far they have stayed put and don't even wobble while we're driving. UPDATE: If you build, or buy a bike rack like this and fulltime in an RV, then spend the money and get a good bike cover. When I went to the RV Store to try and find a bike cover, my cheap spending habits said "$50 for a nylon bike cover, come on!" and I didn't buy it. Now that we've had the bikes on the rack, exposed to the sun for almost a year straight, they are taking a beating from the elements. The tires and leather seats are dry rotting and at $25 per tire, the $50 cover would have saved us money in the long run. Like many other lessons learned the hard way, sometimes you have to spend money to save money. I've also realized that I way over built the rack. For two bikes, this size of metal was overkill. I probably could have shaved off a few pounds by using lighter metal or even aluminum, but again, another lesson learned. **** Mr. Heater Propane Heater One thing that kills our bank of batteries faster then anything is running the campers heater. I'm not sure why the RV industry is so far behind in this department, because the Marine Industry has had non-electric propane heaters for years. Dickinson is a name that comes to mind and if you were going to be doing any extended camping in cold climates, they would be the company to contact. For us, we try and follow that perfect 65-70° range year round, so we try and run our heater as little as possible. What we found to compensate for this is the Mr. Heater portable heater. This small heater uses the little 1lb propane bottles and gives off 9000 BTU's of heat. For around $100 dollars, this little guy should save us from cold nights and too much battery consumption. When we first bought the Mr. Heater, it stated on the box that it would run for 220 hours on a 1lb bottle of propane. Our first test only gave us about 10 hours on a 1lb propane bottle? We usually only run it in the mornings when we first wake up to take the chill out of the camper and then only when it's in the 50's outside, or sometimes just before going to bed to warm the camper up nicely. After multiple bottles in a months time, I was in a outdoor store and grabbed one still in a box to see if it really said that 220 hour statement or was ours just broken? The box says (in fine print) it will run for 220 hours off of a normal sized propane tank which needs a separate 12' Hose Adapter to make the heater work. No big deal, for the little time we use it, it's really saves our battery usage and keeps us warm when we need it. If we were to hit a nasty storm, I bought the hose adapter kit and could run it for longer periods off of our 30lb tanks on the tongue of the camper. Word of Caution!: You should NEVER run the heater in an enclosed space without proper ventilation. We always crack one of the roof top vents when the heater is running. We also have a carbon monoxide detector in the camper, so we feel a bit safer knowing if there was any danger, it would alert us. NEVER Leave any heater running while you're not there, and NEVER, ever, leave any heater running while you are sleeping. There is too great a danger that something could go wrong and you might never wake up. We'd hate to see anyone have any damages caused because they used a heater we recommended and burned their camper down. We got this nice email from a concerned reader: As I read your reply, I was reminded of many other such things that you might mention, along with the the propane heater. People turn their stove top on for heat. Or, even their oven, if they have one. You may have readers who, like me, dream of traveling like you, but aren't there yet. They may even be using a tent. Tenters are even more apt to use something like the heater and because the tent is so much smaller, they are at greater risk. A kerosene lantern left on over night, as a nightlight, can either kill you or give you a monstrously terrible headache and nauseous stomach. Tenters have used charcoal and never awoke again. (One of those occurred right here in Mason County.) So, in short, warn them to never sleep with anything (even candles) burning that is not vented to the outdoors. Thanks, you two, for a wonderful blog. See you on down the road. Dale Bannon - Michigan **** Window Covers Making the mistake on not getting dual-pane windows on our camper has really bothered me. In the summer time the heat these single pane windows allow in the camper is awful.
What I wanted were
some window awnings to block the sun from coming in our two big
So while talking with Best RV Inc., in San Diego California, who went out of their way to fit us in before we left for Baja, we decided to go with window covers instead. These are simply a fabric that allows you to see through during the daytime, but blocks 99% of the heat coming in the window. It's amazing what a huge difference these window covers make on keeping the inside of the camper cool. The best part is, we got both covers made for the cost of one awning! How's that for a good deal.
When they were finished sewing the covers, they installed some stainless steel mounting tabs on the side of the coach, so within a few minutes time, we can have the covers on, or take them down if we needed to. We really don't need to since our installer said they're built strong enough to leave on while we drive. I'd recommend these window covers to anyone who has single pane windows and wants an inexpensive way to keep the inside of the camper cool. Best RV can custom make them for any size window, and out of a handful of colors to match almost any color scheme. We think we're going to get a few more made for the rest of the windows on the camper now that we know how good our first two worked. Best RV said that we can call them with our window measurements, and they can make more covers, then just ship them to us and we can install the mounting tabs ourselves. Each tab is just two stainless steel screws.
This is the view out the side window with the cover on. This was also in the afternoon with the sun beating directly on the window. The cover acts like polarized sunglasses and allows you so see out, but no harmful rays come in. Sewer Hose Holder Mounted to Frame Rails
I was
sick of always walking to the back of the Camper to retrieve my sewer
hose while at the dump station. On the Sunline 2499 model camper, the
sewer connection is in front of the
I carry a 5' hose for when we just go to the dump station and that way I don't have to pull out the big 10' or the 20' hose we carry in the rear bumper. This helps in speeding up a messy process that is the worst part of RVing. So I bought one of the sewer hose holders, along with some metal strapping. Here is a shot of the frame rail where I planned on attaching the hose. I didn't want to mount it under the frame, as I thought it might take away from that precious ground clearance. I bought some Stainless bolts along with some Nylock nuts so I wouldn't have to worry about them coming loose from the vibrations. I made sure to put enough strapping that I could wrap it around the frame and bolt it to itself.
The sewer holder could have actually fit perfect IN the frame rails if I would have had the right tools to shave the plastic a half inch, and drill through the frame. But all of this was done in Jeff's driveway in San Diego. He was nice enough to allow me free space before we headed to Baja, the last thing I needed to be doing was major construction in his driveway. I was a bit worried about drilling through the frame rails anyway, so I decided to leave it out from the frame a bit.
Once it was mounted, it rides up and away from any road debris right on the frame. This was wasted space in my mind, so I actually lost no ground clearance or any space that could be used for anything else. If I wanted to use the rear bumper for anything else, I could always mount another one of these behind the wheels for my longer sewer hoses, and get the poop tubes out of the back bumpers all together.
You can see in this picture that the sewer holder is protected from road debris by the front section of the frame that blocks the holder. This way if I was to kick something up with the truck tires, the holder wouldn't be damaged. Now when I pull to the dump station to do the dirty business, I have the hose right there where I need it. The holder is also big enough that I can leave the Clear 45 Degree attachment on the end of the sewer hose in the tube. This is 100% better than having to take it off every time and store it somewhere which I hated doing. Total time for this was about a half hour and I think I spent under $50 total. Our Solution to Carrying Extra Water for Drycamping & Boondocking
It
didn't take long for us to realize the stock 40 gallon fresh water tank
on the camper was way to small to live fulltime out of. We were
pre-filtering our water before we put it in the holding tank so we could
always drink right from the tap.
What
this has accomplished is, we now use the 35 gallons that we carry in the
bed of the truck strictly for drinking water. The 40 gallons that
we carry in the campers holding tank is
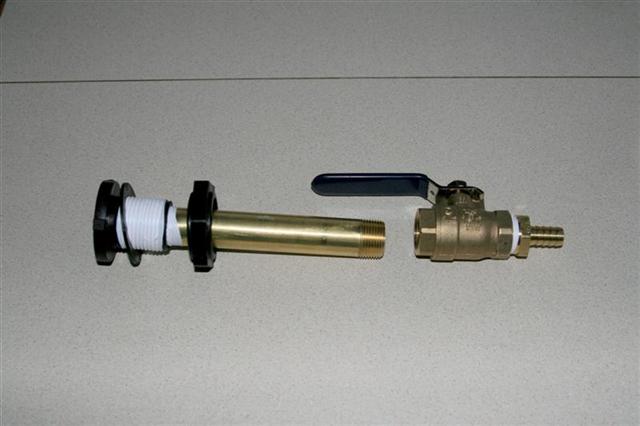
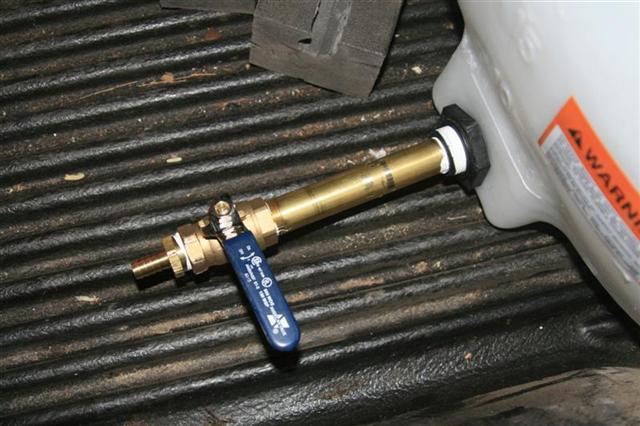
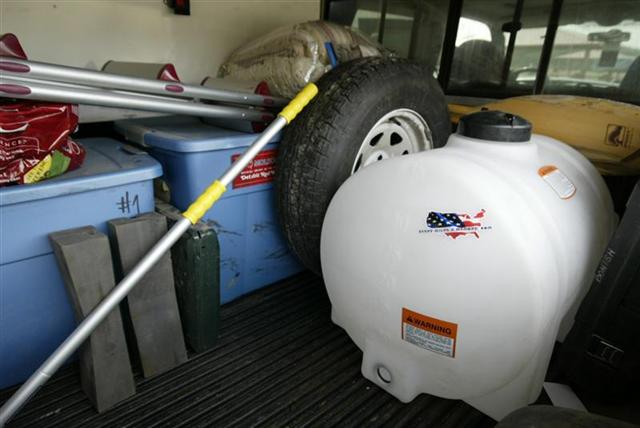
The tank in the bed of the truck can act as a transfer tank and will allow me to refill the campers holding tank as long as I can get within ten feet of the side of the camper. By switching to this 35 gallon fresh water tank, we have cut our plastic water bottle usage to almost nothing. We used to always keep a case of bottled water with us. Now we use a 3 gallon jug that has a spigot on the bottom. We refill this from the tank in the bed, and if we're going out anywhere, we use reusable, washable Nalgene bottles to drink from. This is doing our part to cut plastic waste going to a landfill or needing to be recycled. The 35 gallon poly tank was purchased at a local feed store and is food grade plastic. I put a hose shut off at the bottom of the tank where I could keep the water flowing to the hose by a simple lever. The tank was $89 and with the hose and fittings, I'm right around $100 total for the set-up. It's held in the bed of the truck with a ratchet strap that is connected to the tie down in the truck bed and wrapped around the tank. This holds it steady from shifting when it's full with the water. Here is a shot of the shut off valve I made from pieces I purchased from the local hardware store.
To make it easier to refill our 3 gallon jug, I bought 10' of clear food grade braded poly hose and attached to the hose fitting on the end of the shut off valve with another shut off valve on the end of the hose. This way, you set the jug on the ground, turn the hose on and let gravity fill it with no use of motors or pumps. The valve in the bed is always on, and we just use the shut off valve on the hose to allow the water to empty. I just thought it might be smart to have a shut-off valve right at the tank itself incase we were going to move it or empty it at any point.
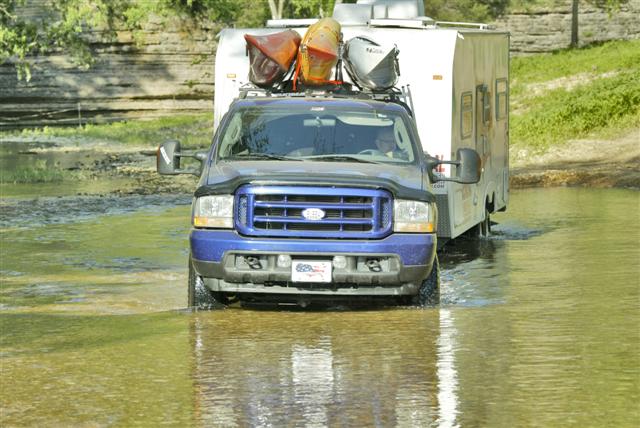
If we need to fill the camper holding tank, I only need to back up to the side of the camper to within 10' of the filler location. The truck bed sits higher than the fill valve, so gravity will do its job here too. Sure I could have added a second fresh water tank, but with the hassle of installation and the work it would have taken to accomplish, the hour it took me to set this up, and the minimal cost was well worth it. Plus it keeps us out in the boonies longer, which is worth its weight in gold! I know this Mod isn't really done on our Camper, but I figured it fit here better than adding it to the Our Truck section. Things we wish we would have changed if we would have known better I'm sure everyone does this, but after a few months of living in a camper full time, you find plenty of things you wish you would have changed from the start. It's always so much easier when the Coach is being built to have them make the changes rather than you do major adjustments aftermarket. 1. We would NOT have had carpet put anywhere inside the coach. Linoleum floors are so much easier to just sweep and mop clean, where the carpet is a pain to vacuum or steam clean and you have to carry along a small vacuum cleaner. Sure, good carpet looks nice, and can hold some of the cold feeling off the floor in those cooler temperatures, but when you add up the maintenance, it's just not worth the hassle. We both regret having Carpet installed in the coach. 2. We never knew you could do this, but I guess a few others have had aluminum roofs installed rather then the typical Rubber Roof. There is just something about a Rubber Roof that leaves you worrying about tearing anytime you drive under a low lying branch. The ease of maintenance and never having to worry about tearing with a aluminum roof would be so much more relaxing on that mind. If we only would have known. 3. A water treatment system. We planned on having one of these Everpure Systems installed as to not have to worry about where we draw our water from. In the long run, we thought we would pay for the system over and over again saving on the cost bottled water and the hassle of carrying around the many jugs of clean water. UPDATED JUNE 2007 - We tried to have this system installed at Camping World in June and they told us that our trailer couldn't have a system like this?? They told us that most campers had a main water inlet and that we'd need a filter attached to each water inlet, since ours has two separate lines?? We were told not to install it unless we wanted to buy two separate filters?? I really wanted this system, since I don't want to worry about stomach illness in any areas that have water trouble. So I'd rather wait and see if we can have another system installed that will fit our needs. We decided that we could just add a couple of filters to our set-up we were already using and save a bit of money. 4. Adding another Fresh Water Tank. We currently only have one 40 gallon fresh water tank. Once we head out West and the campsites become more sparse, and Boondocking will become more inevitable, the added fresh water will come in very handy. 5. Roof Mounted Storage Bins - I really wish we would have had the factory install a set of these roof mounted waterproof storage bins. This way we could keep seasonal items up and out of the way, but still bring them along. Camping World said they would NOT warranty anything that screws through our rubber roof? 6. Convection Oven - I hate using a Microwave because of it's harmful affects it has on the food. I'd rather have paid the extra money and had a convection oven installed. After living in the camper for over a year and only using the microwave 3 times, we actually pulled the microwave out while we were in Quartzsite Arizona and sold it for $50. The extra space it gave us for storage was way better than the amount of space and weight it was taking up and not being used.
Every Miles A Memory! Need Unlimited photo storage- FREE Trial of Smugmug
|
||||||
|
|||||||


 You'll need it
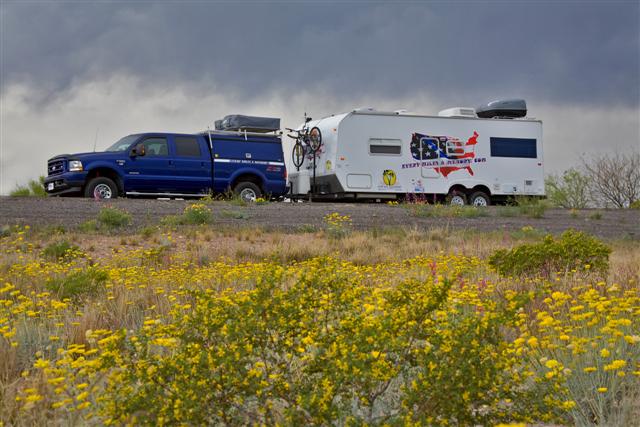 compare
notes from the last visit and know if you're finding yourself looking in
one specific direction with each visit.
compare
notes from the last visit and know if you're finding yourself looking in
one specific direction with each visit. right there eliminated 90% of the
travel trailers on most RV lots.
right there eliminated 90% of the
travel trailers on most RV lots.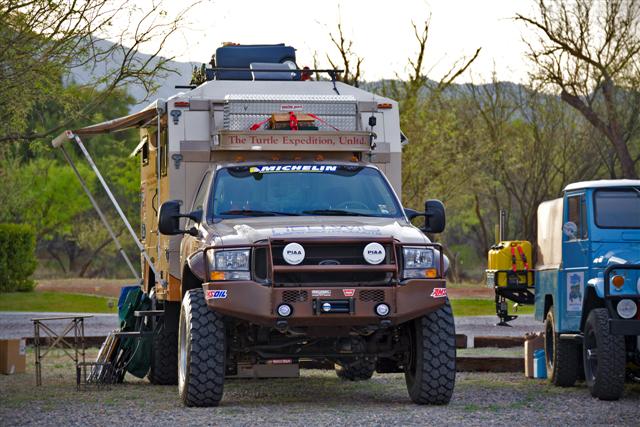 deeper respect for them to be able to live in such a confined space in
such extreme conditions, while traveling the Globe like they have in the
past and still do, for the last few decades.
deeper respect for them to be able to live in such a confined space in
such extreme conditions, while traveling the Globe like they have in the
past and still do, for the last few decades. 
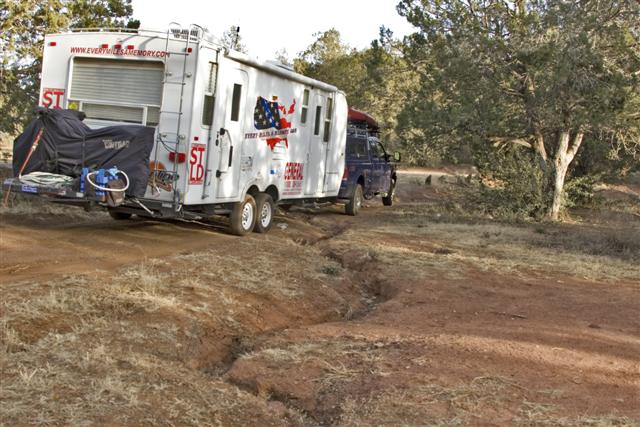
 Luckily for us, General RV said
they felt comfortable
Luckily for us, General RV said
they felt comfortable 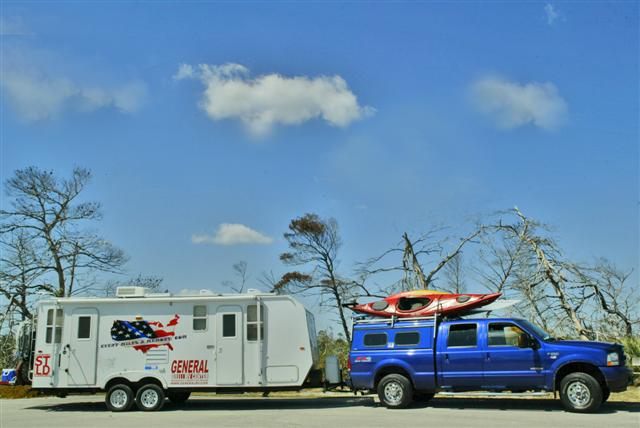

 install
a 4” lift kit which would give us the needed ground clearance to find
those secluded sites we longed to be camping at.
install
a 4” lift kit which would give us the needed ground clearance to find
those secluded sites we longed to be camping at.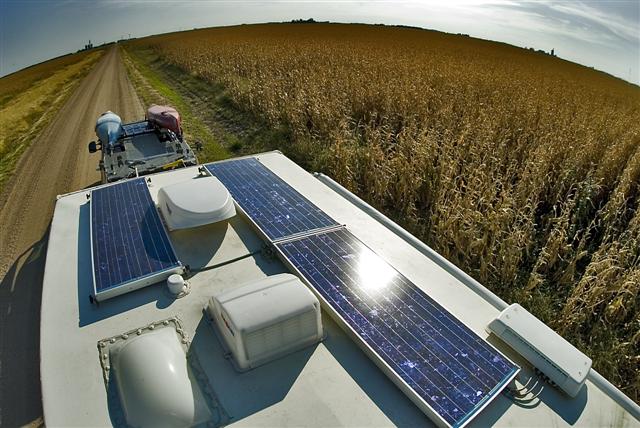 or
working on anything located on the roof. This isn't anything that
you can do to an aftermarket camper without spending way too much money,
but something that should be standard when ordering a new model. This is something you need to
have done at the factory, and another reason we chose a Sunline Coach.
or
working on anything located on the roof. This isn't anything that
you can do to an aftermarket camper without spending way too much money,
but something that should be standard when ordering a new model. This is something you need to
have done at the factory, and another reason we chose a Sunline Coach.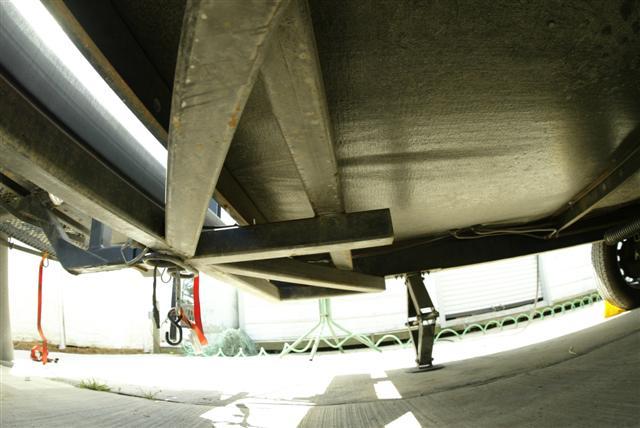 We had General RV
install a heavy duty receiver hitch on the rear of the trailer so we can
mount
We had General RV
install a heavy duty receiver hitch on the rear of the trailer so we can
mount 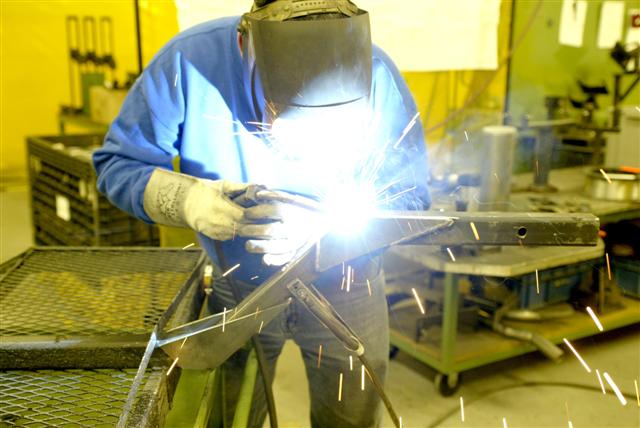 The
stock bumper on the back of the trailer is only rated for 100lbs. and
isn’t safe for supporting anything but a spare tire
The
stock bumper on the back of the trailer is only rated for 100lbs. and
isn’t safe for supporting anything but a spare tire I'd
like to say a huge "Thank You" to my good friends John Kielian and Brian
Kimmel who helped me with actually welding and fabricating my ideas
which were originally just drawn on a bar napkin.
I'd
like to say a huge "Thank You" to my good friends John Kielian and Brian
Kimmel who helped me with actually welding and fabricating my ideas
which were originally just drawn on a bar napkin. 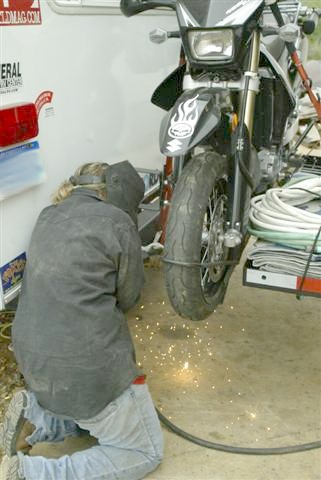 able
to tighten up the slack that was allowing the carrier to wobble while
driving down the road. Since having the nice woman drop what she was
doing and weld the tabs on at
able
to tighten up the slack that was allowing the carrier to wobble while
driving down the road. Since having the nice woman drop what she was
doing and weld the tabs on at
 This
is the final look.
This
is the final look. 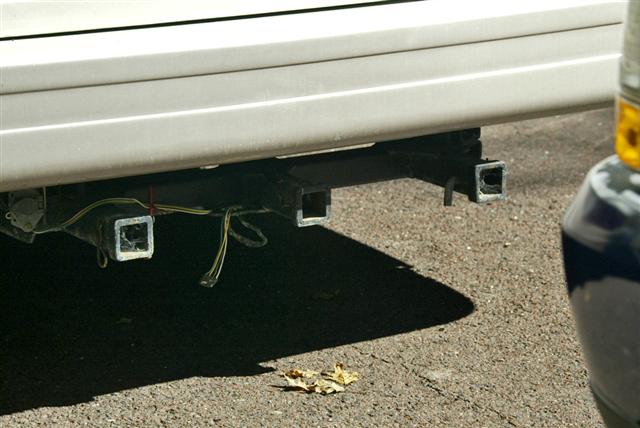

.JPG) This company
This company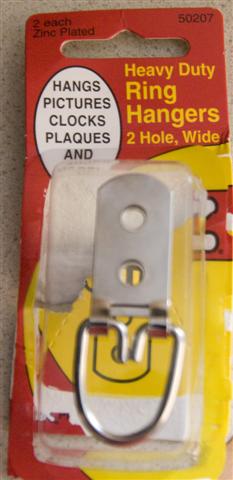
 Over
the past 80,000 miles we've traveled, many of those roads were along
rough back roads, bumpy two track or roads that looked like a blind
grader operator had finished them.
Over
the past 80,000 miles we've traveled, many of those roads were along
rough back roads, bumpy two track or roads that looked like a blind
grader operator had finished them.  Once
I had the ring hangers screwed in - This took all of one minute each,
and there was four total, I measured and cut some Velcro strap material
so I would have enough to go around each ring hanger and still have
plenty of Velcro to get a good bite on itself.
Once
I had the ring hangers screwed in - This took all of one minute each,
and there was four total, I measured and cut some Velcro strap material
so I would have enough to go around each ring hanger and still have
plenty of Velcro to get a good bite on itself. 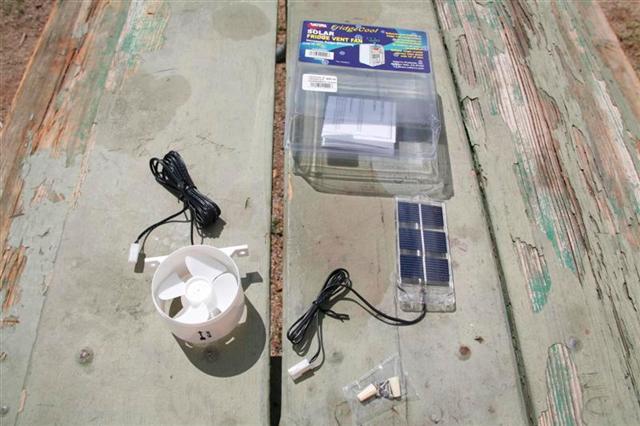
.JPG) Once
I got the vent cover off, I had to cut through the screening that normally
covers the opening. I plan to mount some new screen back on once I find
a small sheet of it.
Once
I got the vent cover off, I had to cut through the screening that normally
covers the opening. I plan to mount some new screen back on once I find
a small sheet of it. .JPG)
.JPG)
.JPG) They
installed a
They
installed a.jpg) Carl, the master electrician over at General RV does some of the best work I’ve seen in years
Carl, the master electrician over at General RV does some of the best work I’ve seen in years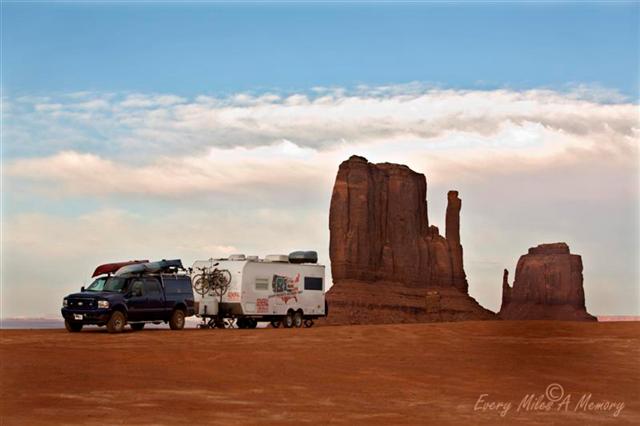 the computers and not have to fire up the larger 2000 watt
inverter which draws more power from the bank of batteries.
the computers and not have to fire up the larger 2000 watt
inverter which draws more power from the bank of batteries.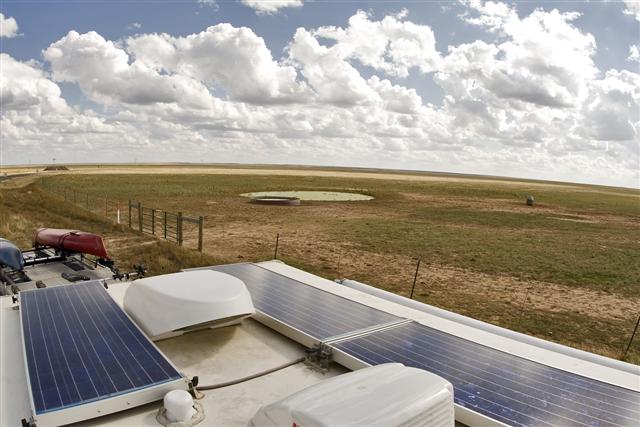 store
for us. If we see rain or a cloudy day approaching, then we might
not run everything and we make sure to keep a little reserve left in the
batteries.
store
for us. If we see rain or a cloudy day approaching, then we might
not run everything and we make sure to keep a little reserve left in the
batteries.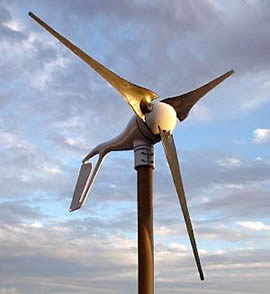 After
years of using only solar to keep our bank of batteries charged, we've
now added a 400watt Air-X Turbine to the camper for those days the sun
decides to hide behind the clouds, but the winds continue to blow.
After
years of using only solar to keep our bank of batteries charged, we've
now added a 400watt Air-X Turbine to the camper for those days the sun
decides to hide behind the clouds, but the winds continue to blow.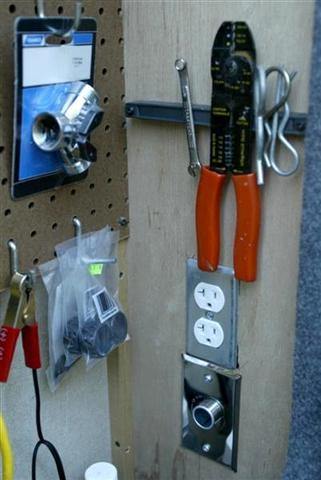 Since
we Boondock more then the average Camper, we've had
General RV
Since
we Boondock more then the average Camper, we've had
General RV.JPG) After
a few months on the road, one thing we found that helped us out quite a
bit was a smaller
After
a few months on the road, one thing we found that helped us out quite a
bit was a smaller
%20(Small).JPG) Anyone who's spent time inside a Travel Trailer knows every
square inch of space is needed to be used to its fullest. Lucky for me, I have a
Brother-In-Law that knows his way around when it comes to building
things with wood. I called him up one day and asked if I could
borrow him for a few hours. This is harder than you think
considering h
Anyone who's spent time inside a Travel Trailer knows every
square inch of space is needed to be used to its fullest. Lucky for me, I have a
Brother-In-Law that knows his way around when it comes to building
things with wood. I called him up one day and asked if I could
borrow him for a few hours. This is harder than you think
considering h.JPG) We took the original counter top off and moved it to the top of the new
cabinet so it maintained the look of the kitchen counter top and the
dining table. By doing this, we gained so much usable space that I cant
believe anyone wouldn't go through the minimum work it involved.
We took the original counter top off and moved it to the top of the new
cabinet so it maintained the look of the kitchen counter top and the
dining table. By doing this, we gained so much usable space that I cant
believe anyone wouldn't go through the minimum work it involved..JPG) I
owned a set of
I
owned a set of .JPG) By removing the speaker stand that was mounted to the bottom of the
small speaker, I was able to hide the speaker in the slot and mount it
with some metal strapping material screwed to the base of the cabinet.
By removing the speaker stand that was mounted to the bottom of the
small speaker, I was able to hide the speaker in the slot and mount it
with some metal strapping material screwed to the base of the cabinet..JPG) At
one point I thought I had made a huge mistake when I realized the volume
controls made one of the speakers too tall to fit. I about Crapped my
pants when I discovered this, because all along, I had been doing all
the measurements with the smaller speaker.
At
one point I thought I had made a huge mistake when I realized the volume
controls made one of the speakers too tall to fit. I about Crapped my
pants when I discovered this, because all along, I had been doing all
the measurements with the smaller speaker..JPG)
.JPG)
 This isn't good if one was to blow off
and hit a passing car windshield or worse yet, a motorcyclist. How do I fix this? This was easily accomplished
with a $10 item from General RV.
This isn't good if one was to blow off
and hit a passing car windshield or worse yet, a motorcyclist. How do I fix this? This was easily accomplished
with a $10 item from General RV.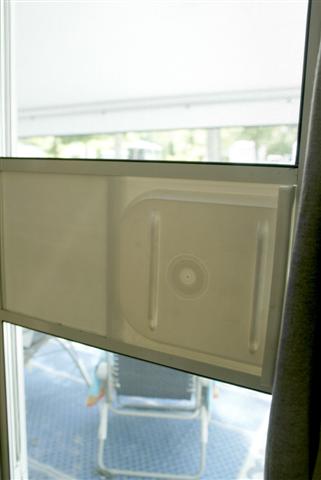 inside the camper and was trying
to see out the screen door.
inside the camper and was trying
to see out the screen door. 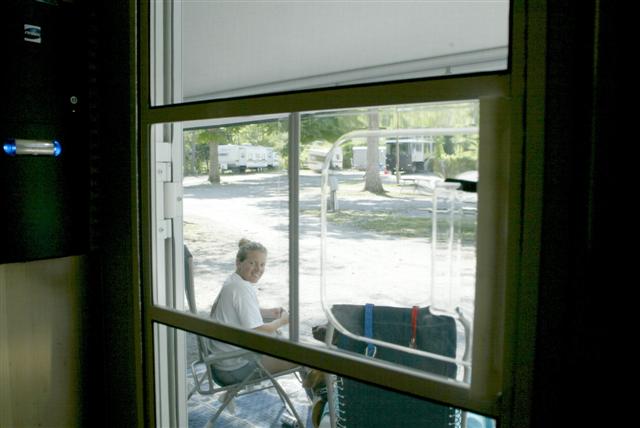
.JPG)
.JPG)
.JPG) It only took about 2 minutes to screw in, with one screw going in with
the stock screw in the hinge, and the second one going in the door
frame. The hardest part was getting the spring stretched while holding
the screw in the little hole I had pre-drilled.
It only took about 2 minutes to screw in, with one screw going in with
the stock screw in the hinge, and the second one going in the door
frame. The hardest part was getting the spring stretched while holding
the screw in the little hole I had pre-drilled.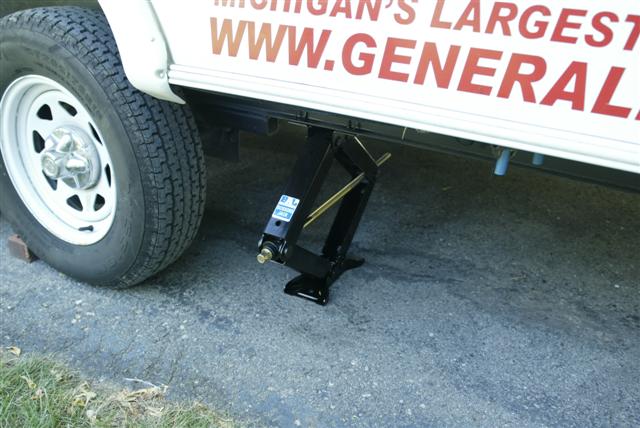

 windows
in the back of the camper. But once we had the windows measured,
we found out that with the ladder on the back of the coach, the awning
mechanism was too wide to be mounted.
windows
in the back of the camper. But once we had the windows measured,
we found out that with the ladder on the back of the coach, the awning
mechanism was too wide to be mounted.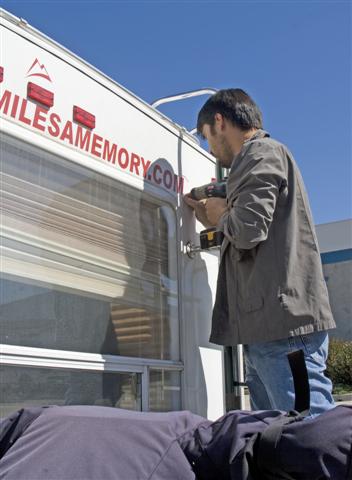 Best RV Inc. measures
the windows and custom sews the covers for each order. Normally
they'll come to your location (in California) and install them for you,
but for us not having any specific location, we decided to come to them.
Best RV Inc. measures
the windows and custom sews the covers for each order. Normally
they'll come to your location (in California) and install them for you,
but for us not having any specific location, we decided to come to them.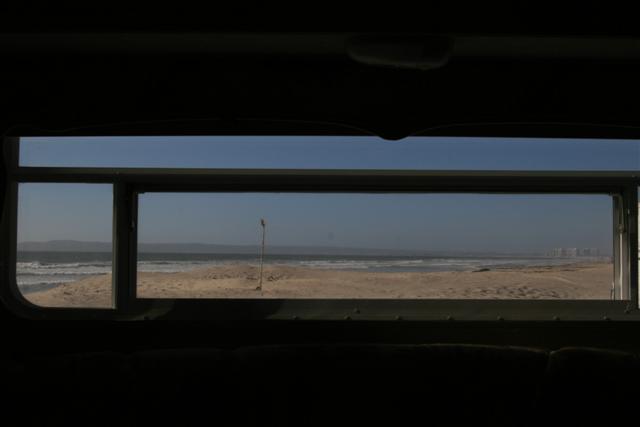
 tires and the only place to store a
sewer hose is in the back bumper. I know, that 20' is a long way
for my lazy butt to walk.
tires and the only place to store a
sewer hose is in the back bumper. I know, that 20' is a long way
for my lazy butt to walk..JPG)
.JPG)
.JPG)
 used for flushing, showering and
washing dishes. If we are set up in a nice secluded spot and we
run out of water in the camper, I can run into town with just the truck
and not have to break down camp to go fill the holding tank.
used for flushing, showering and
washing dishes. If we are set up in a nice secluded spot and we
run out of water in the camper, I can run into town with just the truck
and not have to break down camp to go fill the holding tank.