 |
|||||||
|
|
|||||||
|
|
When I get to a place for the first time and know it like home, this is when I know my journey will be over – Unknown
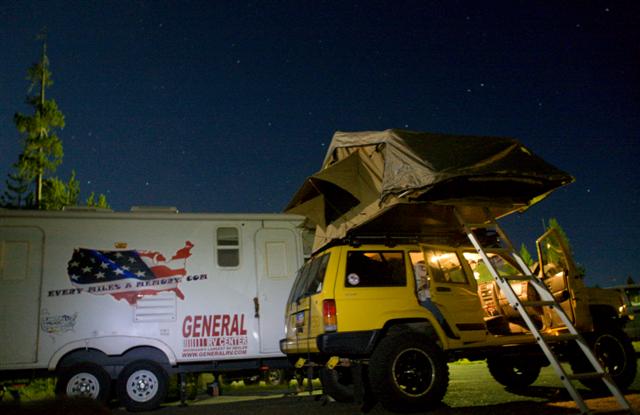
Camping Lab Roof Top Tent Review Cindy and I have been on the road for almost 4 years now. We've been in our 25' Sunline travel trailer the entire time. There have been times we wanted to leave the camper behind and explore areas more remote or off the beaten path. Not wanting to rough it too much, I mean we are pretty used to this Glamping Lifestyle we live, we started looking for options to enable us to get into those remote areas, yet still have the comforts of a comfortable bed, protection from the elements and not have the hassles of roughing it on the hard ground. After having friends come visit us in Yellowstone who had a Roof Top Tent on their Jeep, we both loved what we saw and started looking at various models on the market.
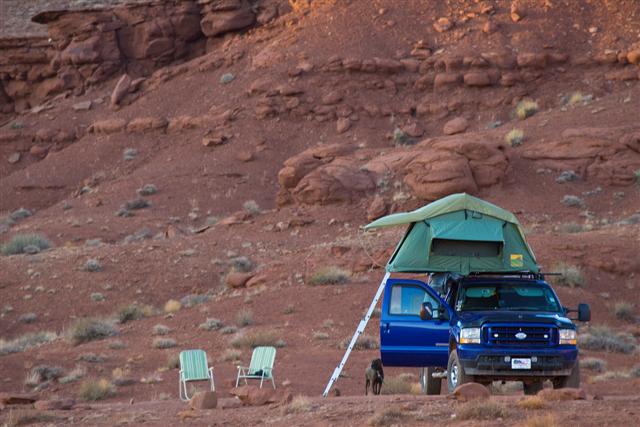
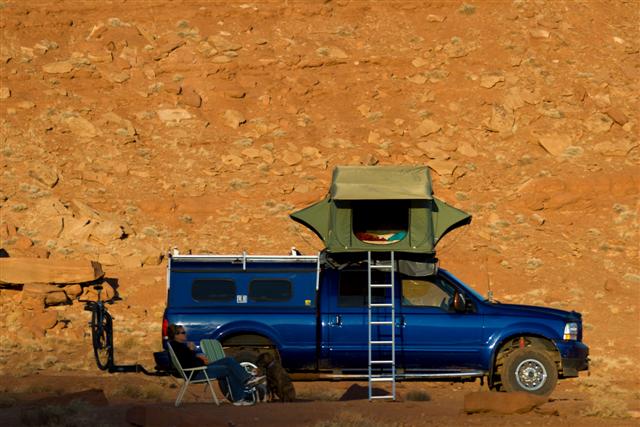
We read a ton of reviews, talked with a few people in the Overland community who owned various models. We asked them what they liked or disliked about their tents and after hearing so many rave about Camping Lab, their competitive prices, top notch quality and their awesome Customer Service, we decided on a Camping Lab medium sized tent that measured in at 55" wide by 94" long. Camping Lab offers 3 sizes to choose from with their small coming in at 47" wide by 97" long (Just narrower than a queen sized bed) or their Large size coming in at a whopping 71" wide by 97" long. The small would be pretty tight quarters for the two of us with gear and the large would be too big. I thought it would take up more heat to keep warm in colder temps and just be added weight on the roof of the truck. It's just Cindy and I, so there is no need to go that big. It would be different if our daughter was at an age where she still camped with us, but those days are long gone. We figured our queen sized bed we have in our camper is 56" wide x 74" long, so the medium sized tent would give us a little extra room at our feet to leave shoes, clothes or jackets at while we're sleeping in the tent. I liked the fact that the Camping Lab Tent offered fast set up with little to do except pull off the protective cover, pull on the aluminum ladder which swings the tent over basically setting it up in one swift move. If you choose to crawl into the 3" thick, closed cell foam mattress at this point, you've got a comfortable bed to sleep on with almost no time wasted to make camp. We found once our tent was set up, we could leave our sleeping bags inside when folding it back up to drive off. This really speeds up the process of breaking camp and also leaves your bed ready to crawl back into the next time you stop.
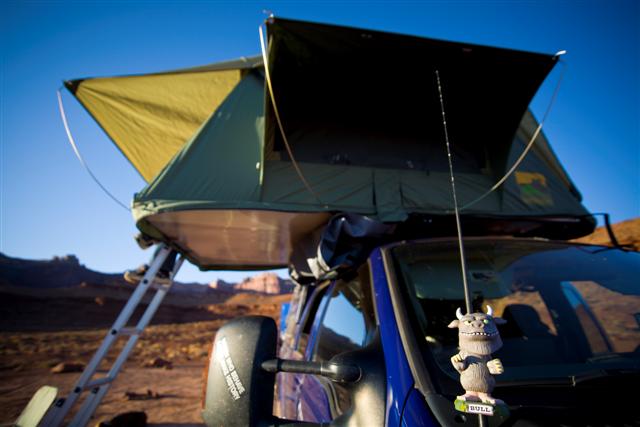
The Delivery guy showed up with a giant box all wrapped up nice and dry. Fernando, the owner of Camping Lab was real good about packing up the tent for delivery making sure no matter what the delivery company put it through, it showed up dry with no signs of damage in route from Miami to Utah where we had it delivered to. I unboxed the tent and was amazed with everything that came with the tent. All the hardware is stainless and Fernando even sends wrenches so if you already have the roof top bars, the tent can probably be mounted in under an hour. Before you get to mounting it, you have to decide which side you want the tent to open up onto....off the back of the vehicle, out the drivers side or off the passenger side. I contemplated mounting it on the rack already built on our bed cap having it open off the back of the truck, but thought I'd try it above the cab of the truck at first. If I wanted it on the cap, I'd have to have the aluminum bars I put up there to carry our kayaks moved, so I thought I'd see how this worked first.
Mounting the tent itself is pretty simple as long as you have some sort of mounting bars to bolt it to. Since our F-250 doesn't come with a stock roof rack, I had to go buy one. Dont remind me that I already have a set of these bars and all the mounting hardware to go along with them sitting in a box back in Michigan. So a quick trip to the local Outdoor Store and a measly $300 and I was back with yet another set of bars. Once the brand new bars were on the roof, I was ready to lift up the tent to get it bolted down. This was where a second person is needed. Not that the RTT is that heavy, its just too cumbersome for one person to lift up there by themselves. I had opened it on the ground just to make sure I knew how far it would extend and that I'd know where to bolt it to the bars. Camping Lab sends a set of directions that walks you through the mounting process step by step, so no matter how bad you are at putting things together, anyone should be able to do this without too much hassle.
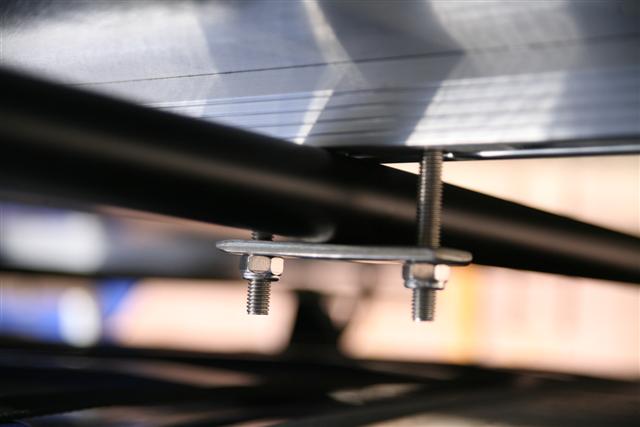
Grabbing Cindy out of the camper, we hoisted the RTT on to the bars and the rest was up to me. Just a few measurements before I was tightening down of the provided nylock nuts onto the stainless steel bolts. I thought it was pretty cool how everything fit so perfectly. There is a track for the bolts to slide into so you only need to use the provided wrench on the nuts.
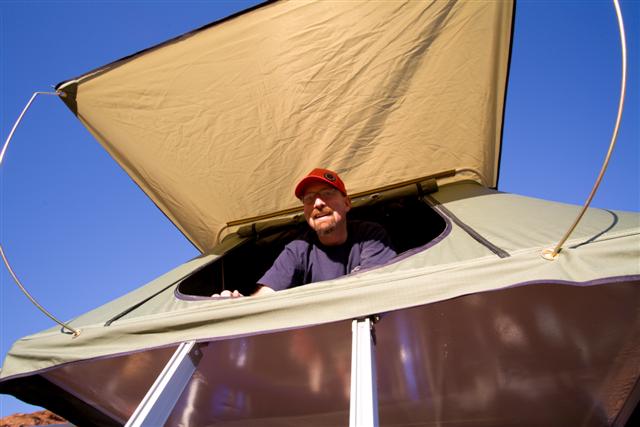
Mounting the tent to the load bars is done by simply lining it up so it looks even on the roof of the truck, then sliding the mounting pieces into the track and tightening the stainless steel plates. Once everything was tightened down, I unfolded the tent to see how it looked. We crawled up into the spacious quarters and got used to our new home away from home.
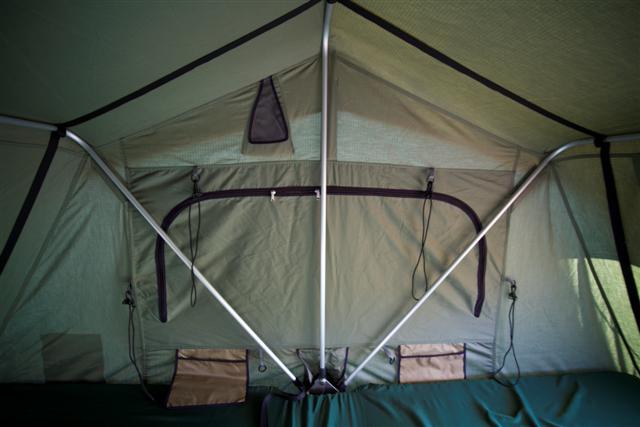
Inside the tent there are pockets along the sides to keep flashlights, gloves, a hat or anything else you might need while camping close by. There are also bungee cords that stretch from side to side on quick release buckles to help pull in the sides when folding the tent up. Doors are on each side with big screened windows all the way around. The top of the tent has a screened vent to allow excess moisture to escape and not collect on the walls.
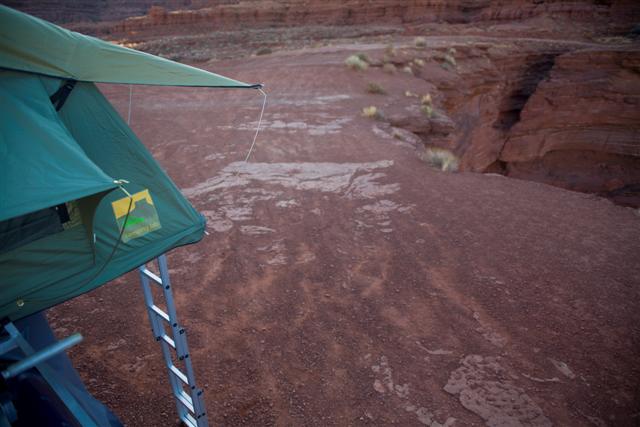
There are poles that hook into the rain fly and mount into the base of the frame to hold the fly out away from the windows and doors. If its windy and you dont want the fly up in the air to catch the wind, there are mounting tabs to hold the fly tight against the bottom of the tent. Everything is very well thought out and professional constructed on the Camping Lab tent. I was very impressed with its construction and final finish. Testing the Camping Lab Roof Top Tent Before we actually went out to use the tent for real, I wanted to set it up when I wasn't pressed for time or with darkness approaching and could get some practice. No need in having the first time using it become a nightmare, and it also gave us a reason to go find a nice windy ridge to see what it was like to put everything up in a wind storm.
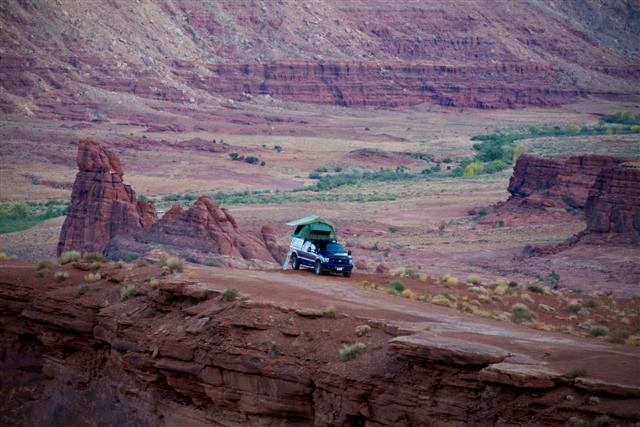
Being as we were staying in Moab Utah at the time, we had plenty of access to high desert plateaus where you can always find a strong breeze blowing. Cindy and I drove up the Cane Creek Road to Hurrah Pass and found a beautiful vista to park and see what would happen if I tried to make camp in a wind storm. She watched as I did everything by myself, something that I wanted to do so I would make sure I could do it by myself if I had to. The wind really isn't a factor and except for making the rain fly flap a little, despite the 20mph winds, I had camp set up in about 10 minutes. We hung out and laid around in the tent seeing what it was like in a few different configurations with the rain fly up, the rain fly strapped down and every other configuration we could think of.
My only complaint with the entire set-up is the zipper on the waterproof cover. Its somewhat hard to get started for me and you have to make sure when pulling the zipper around the base, which waterproofs everything, that you dont catch any of the tent fabric in the teeth of the zipper. If there was some sort of hard sided cover that could simply be lifted on and off, it would make the entire set up take maybe 5 minutes. Either way, its so much easier then trying to roll back up a standard ground tent, stuff it back into a small bag and worry about being in the dirt the entire time. We were ready for our 1st Camping Trip - White Rim Trail Here we Come A few days later we would head out to Canyonlands National Park to test it out for real. We had a trip planned to drive the 100 miles of bumpy, tight two track along Utah's infamous White Rim Trail.
The trail itself is amazing, and would make our 1st night of camping in the Roof Top Tent be one we'd never forget. The day went great with beautiful scenery in every direction we looked. As we pulled into our camp for the night, I had the tent set up within minutes while Cindy got started on dinner. As we were eating dinner, the winds started to pick up and within minutes it seemed like the temperature had dropped 20°.
We finished up with our meal and climbed up into the protection of the tent for the remainder of the night. Little did we know that the next few hours Mother Nature would do her best to try and blow the tent off the roof and buckle the aluminum supports. With wind gusts of up to 50 mph, we sat prisoner in the tent with what sounded like a freight train roaring past us. The rain fly was flapping against the side of the tent so hard, I was certain that our first night using our brand new tent would result in having the fabric shredded by the winds. We learned that the tent is much better in winds with the rain fly buckled down tightly rather than have the poles holding the fly open which only catches the winds more. We also learned that in the future, we need to stake down the ladder. The winds were blowing so strong, that on numerous occasions would the folded out side of the tent rise up from the level position which would allow the ladder to swing freely below it.
Some how over the course of the night we both managed to fall asleep despite the howling winds. We woke to a dead calm and a beautiful blue ski making us question whether it was all just a bad dream. I shimmied down the ladder and put it back the way it was supposed to go so Cindy could come back down to solid ground, and our first night in the tent was a wild one, that's for sure. We were both amazed that nothing on the tent had tore, the tent itself had stayed standing all night and we were surprisingly warm and comfy in that crazy of a storm.
I plan to build a little flip out table off the back of the truck where we'll be able to prepare food and have a roof over our heads if the weather is bad. Plus, with the RTT over the bed of the truck, the windshield throws the wind up and over it rather than catching it like it was doing when it was mounted over the cab. I'll be sure to follow up as we use it more often and figure out ways to improve upon an already solid base. If you're looking to add some comforts to your camping experience, I'd recommend a Camping Lab Roof Top Tent any day of the week. The mattress is soft and comfortable, the ease of use is just amazing, and after surviving that wind storm, I'm thinking this tent is going to hold up to years of abuse. |
||||||
|
|||||||


 There
are many to choose from with prices ranging from a few hundred dollars
to the cost of a low end camper. Knowing we'd only be using this
tent once or twice per month, till we became more used to this type of
exploring, neither of us wanted to spend a fortune on something we
wouldn't be using daily.
There
are many to choose from with prices ranging from a few hundred dollars
to the cost of a low end camper. Knowing we'd only be using this
tent once or twice per month, till we became more used to this type of
exploring, neither of us wanted to spend a fortune on something we
wouldn't be using daily.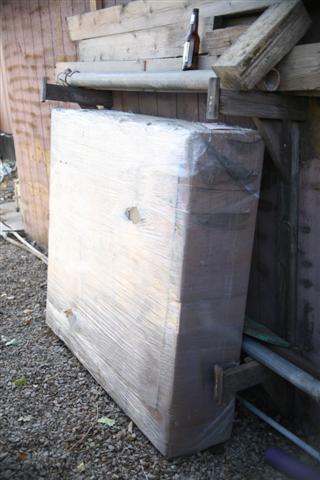 Hold
Up, I'm getting way ahead of myself here. Let me back up to the
day we got our tent delivered.
Hold
Up, I'm getting way ahead of myself here. Let me back up to the
day we got our tent delivered.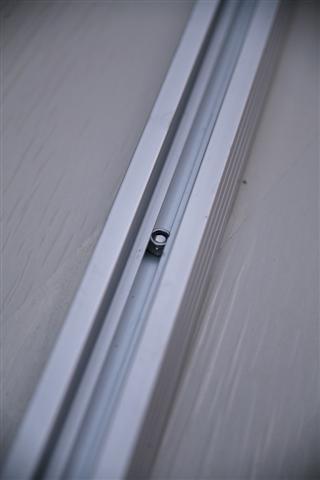 I'd
advise against mounting it so it opens up onto the drivers side only for
the reason that 99% of designated campgrounds are set up for passenger
side access, it might make it awkward if entering and exiting off the
drivers side of the vehicle.
I'd
advise against mounting it so it opens up onto the drivers side only for
the reason that 99% of designated campgrounds are set up for passenger
side access, it might make it awkward if entering and exiting off the
drivers side of the vehicle.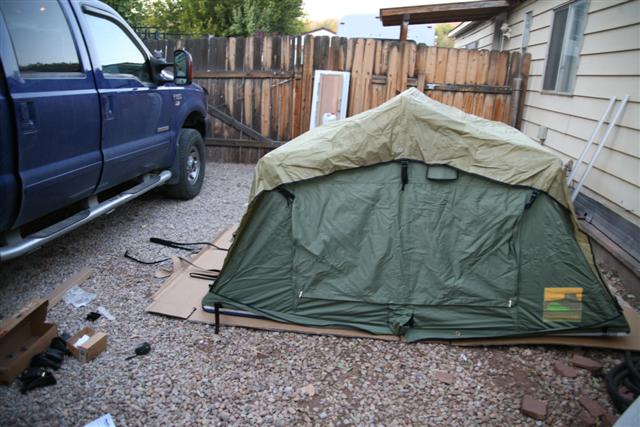
 Packing
it up takes a little longer than setting it up, but only because of how
tall my truck is and how short I am. For me to do anything with
the tent, I either need to be on a ladder the entire time, or climb
right up onto the roof and do everything from up there.
Packing
it up takes a little longer than setting it up, but only because of how
tall my truck is and how short I am. For me to do anything with
the tent, I either need to be on a ladder the entire time, or climb
right up onto the roof and do everything from up there.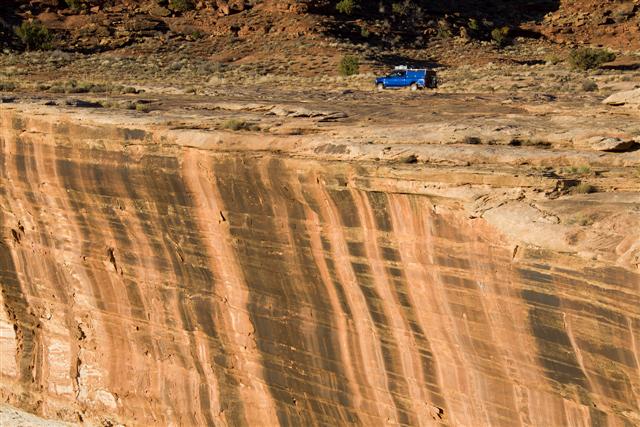
 One
of the times it raised up so high, the ladder swung opposite and landed
against the truck. This meant that when Cindy got so scared from
the force of the winds and thought it would be safer sleeping inside the
truck, there was no way for her to climb back down the ladder.
One
of the times it raised up so high, the ladder swung opposite and landed
against the truck. This meant that when Cindy got so scared from
the force of the winds and thought it would be safer sleeping inside the
truck, there was no way for her to climb back down the ladder.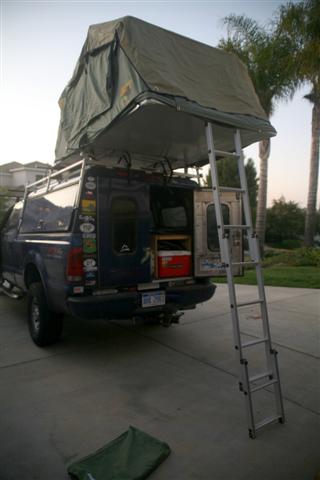 After
that first time out camping, we both decided that we'd rather have the
tent open up off the back of the truck which would allow the section of
tent that flips out to act as an awning over the back doors.
After
that first time out camping, we both decided that we'd rather have the
tent open up off the back of the truck which would allow the section of
tent that flips out to act as an awning over the back doors.